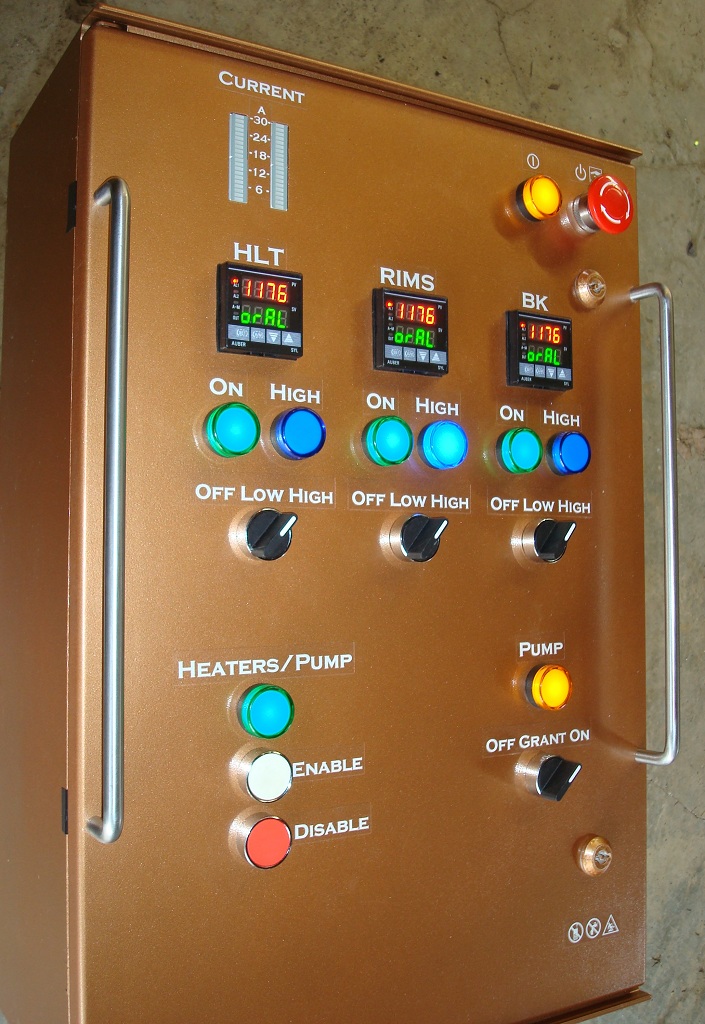
This is the front panel, assembled just now for a quick picture.
The paint is Rustoleum hammered copper spray paint. I printed the labels on our Brother label printer using 19mm transparent laminated tape with white ink. The font is Copperplate Gothic Bold which I thought was appropriate given the paint, and I like how it looks.

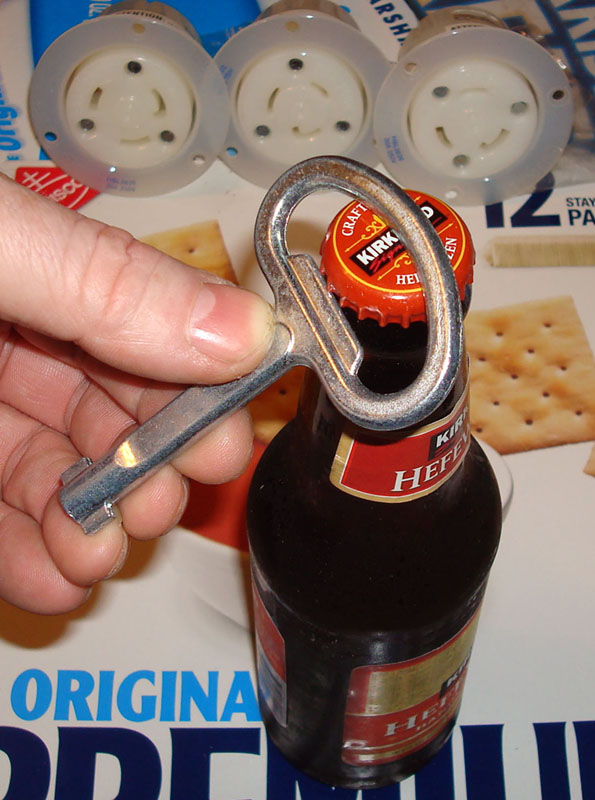
The key for the two latches of the Rittal enclosure works great as a bottle opener. I don't think they intended it to open beers, but it is rather funny that it does. In the background are two 30A 240V locking outlets on the outside (for HLT, BK) and a 20A outlet in the center (RIMS). There is a subtle difference in the diameter of the circle of the prongs.
The back panel is now installed in the enclosure and it is partially wired. Next I will wire up the door and the heater outlets on the bottom.
April 16, 2011
I finished the control panel today. This picture demonstrates the power priority function. All three power selectors are set to High power, but the switch logic allows only the RIMS power to be high, HLT and BK are on low power so to not exceed the 30A overall limit. For some reason the pilot lights do not show well in this picture but in real life it is quite obvious which lights are on or off. The heater elements and the pump are not yet connected so the ammeter shows no current draw. The current drawn by the relays and pilot lights is negligible.
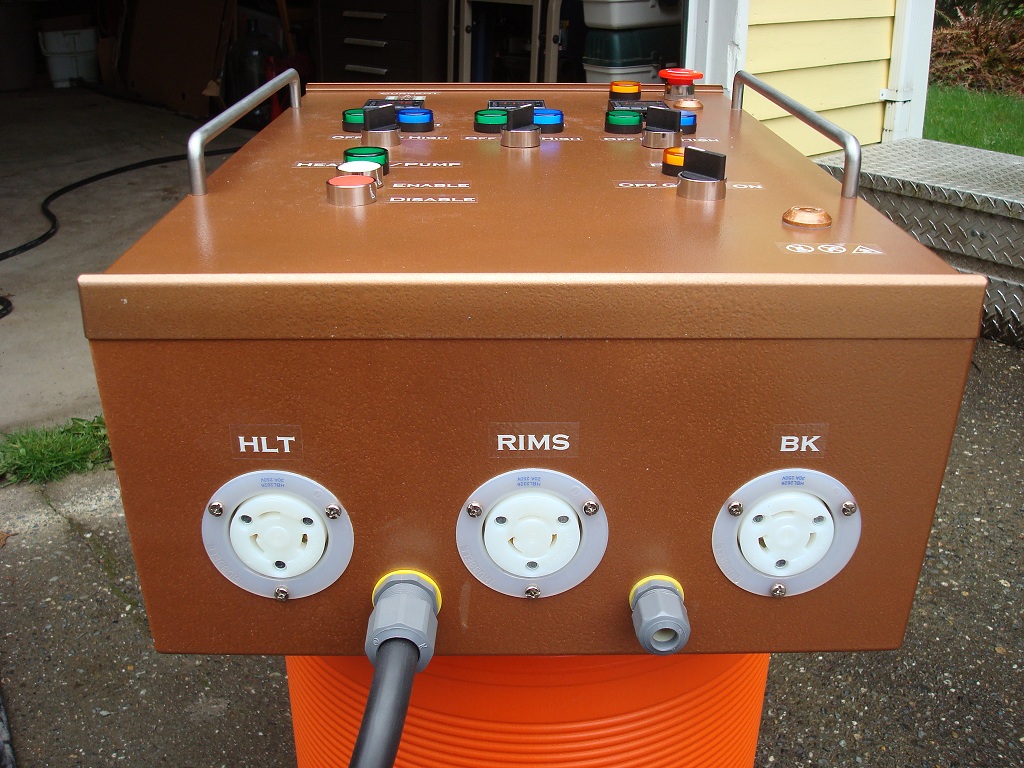
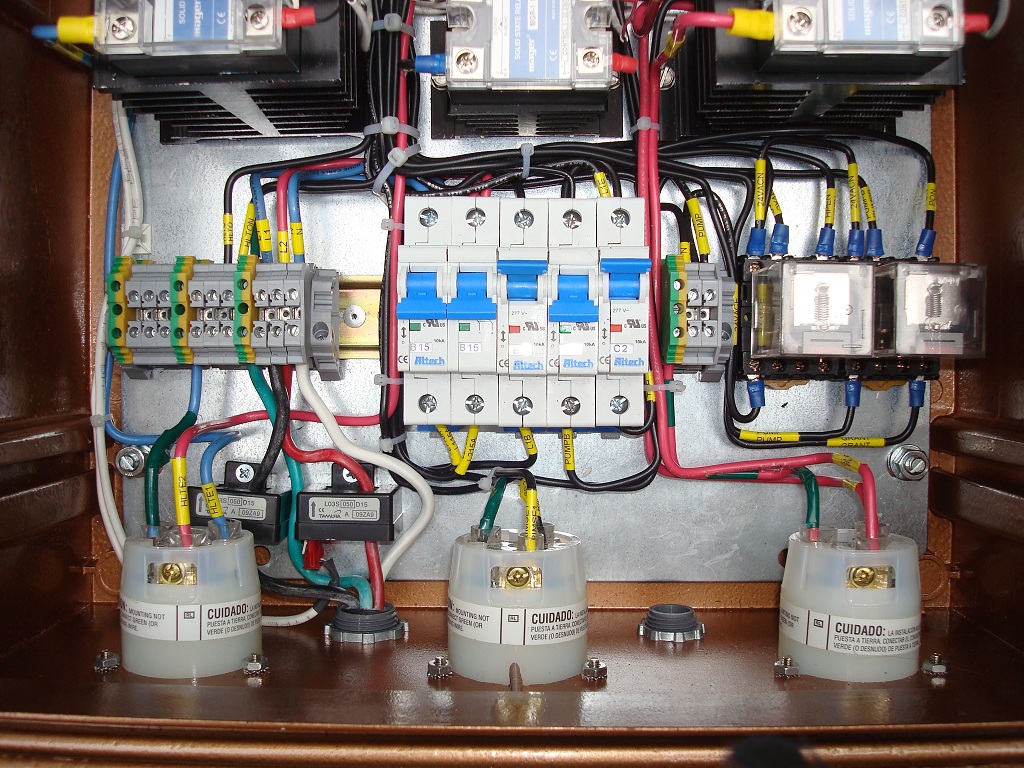
The bottom of the panels has three jacks for the heater elements. The left cable gland holds the input power cord while the right one is for the pump.
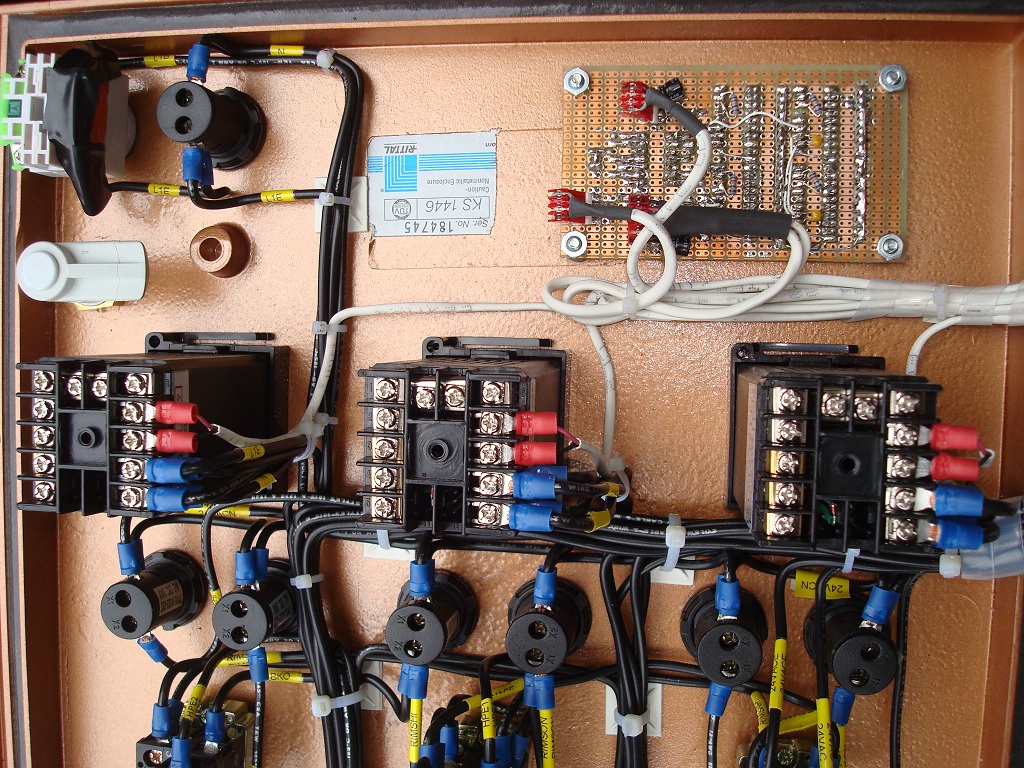
Overview of the open control panel.
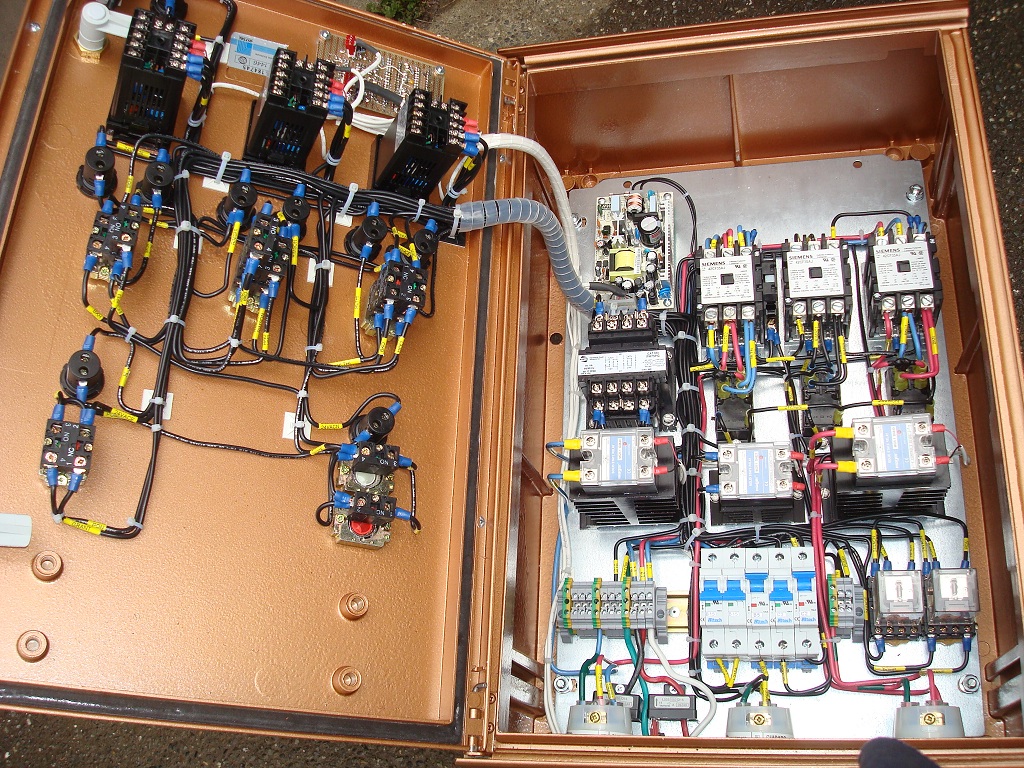
The lower part of the back panel. The wires are labeled with net names corresponding to the wiring diagram. Brother makes a flexible laminated tape for this purpose.
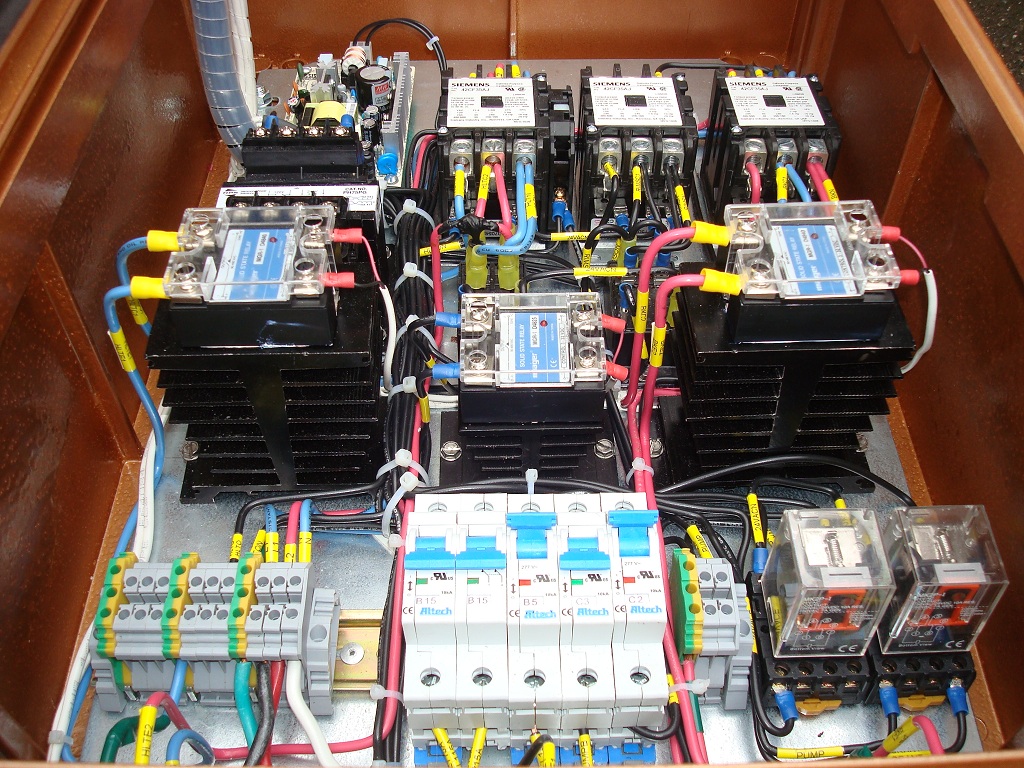
The HLT and BK SSRs are both 40A on 40A heat sinks from Auber Instruments. The RIMS SSR is 25A on a 25A heat sink, also from Auber. The left two circuit breakers are tandem 15A B curve for the RIMS element. By using a lower breaker current for the RIMS I can wire it with 14 AWG rather than 10 AWG which I used for the HLT and BK.
This shot is from the inside of the door. In the upper right is my prototype ammeter. The three PIDs are all wired except for the RTD temperature sensors. I will finish these connections as I assemble the rest of the brewery. I masked the Rittal label before painting so I can read the model number should it become necessary.